Introduction
If you’re looking for a way to spruce up your outdoor furniture, consider refurbishing your resin chairs. Refurbishing resin chairs is a great way to give them a new look without having to buy new furniture. With a few simple steps, you can make your resin chairs look like new again. This guide will provide you with the steps and materials needed to refurbish your resin chairs.
How to Clean and Prepare Resin Chairs for Refurbishment
Resin chairs are a popular choice for outdoor furniture due to their durability and low maintenance. However, over time, they can become dirty and faded, making them look less attractive. Refurbishing resin chairs is a great way to restore their original look and make them look like new again. This guide will provide step-by-step instructions on how to clean and prepare resin chairs for refurbishment.
Step 1: Gather Supplies
Before you begin, you will need to gather the necessary supplies. You will need a bucket, a sponge, a soft-bristled brush, a garden hose, a mild detergent, and a garden sprayer.
Step 2: Rinse the Chairs
Using the garden hose, rinse the chairs to remove any dirt and debris. Make sure to rinse the chairs thoroughly.
Step 3: Clean the Chairs
Mix a mild detergent with warm water in the bucket. Dip the sponge into the mixture and use it to scrub the chairs. Use the soft-bristled brush to scrub any stubborn dirt or grime. Rinse the chairs with the garden hose once you are finished.

Step 4: Dry the Chairs
Allow the chairs to air dry completely before proceeding.
Step 5: Prepare the Chairs for Refinishing
Once the chairs are dry, use a garden sprayer to apply a light coat of paint stripper to the chairs. This will help to remove any old paint or sealant. Allow the stripper to sit for a few minutes before wiping it off with a damp cloth.
Step 6: Refinish the Chairs
Once the chairs are clean and prepared, you can begin to refinish them. Use a paintbrush to apply a coat of primer to the chairs. Allow the primer to dry before applying a coat of paint. Once the paint is dry, apply a sealant to protect the chairs from the elements.
By following these steps, you can easily clean and prepare resin chairs for refurbishment. Refurbishing resin chairs is a great way to restore their original look and make them look like new again.
Tips for Painting Resin Chairs for a Fresh Look
1. Start by cleaning the chairs with a damp cloth to remove any dirt or dust.

2. Sand the chairs lightly with a fine-grit sandpaper to create a smooth surface for the paint to adhere to.
3. Apply a coat of primer to the chairs, making sure to cover all surfaces. Allow the primer to dry completely before moving on to the next step.
4. Once the primer is dry, apply a coat of paint to the chairs. Use a brush or roller to ensure even coverage. Allow the paint to dry completely before applying a second coat.
5. Once the paint is dry, apply a coat of sealant to protect the paint and give it a glossy finish.
6. Allow the sealant to dry completely before using the chairs.
Following these steps will help you achieve a fresh look for your resin chairs. With proper care and maintenance, your chairs will look great for years to come.
How to Reupholster Resin Chairs for a New Look
Reupholstering resin chairs is a great way to give them a new look and extend their life. Resin chairs are a popular choice for outdoor furniture because they are durable and easy to maintain. However, over time, the fabric on the chairs can become faded or worn, making them look outdated. Reupholstering the chairs is a simple and cost-effective way to give them a fresh look.
Before you begin, you will need to gather the necessary supplies. You will need a staple gun, fabric, scissors, and a screwdriver. You will also need a foam cushion, if your chair has one.
Once you have all of your supplies, you can begin the reupholstering process. Start by removing the old fabric from the chair. Use the screwdriver to remove any staples or screws that are holding the fabric in place. Once the fabric is removed, you can begin to attach the new fabric.
Start by laying the fabric over the chair and cutting it to size. Make sure to leave a few inches of extra fabric around the edges. Next, use the staple gun to attach the fabric to the chair. Start at the center of the chair and work your way out. Make sure to pull the fabric tight as you go.
Once the fabric is attached, you can add the foam cushion, if your chair has one. Place the cushion on top of the fabric and use the staple gun to attach it. Make sure to pull the fabric tight as you go.
Finally, you can add any decorative trim or buttons to the chair. This is a great way to give the chair a unique look.
Reupholstering resin chairs is a great way to give them a new look and extend their life. With the right supplies and a bit of patience, you can easily give your chairs a fresh look.
How to Add New Cushions to Resin Chairs for Comfort

Adding new cushions to resin chairs can be a great way to increase comfort and add a touch of style to your outdoor seating area. This guide will provide step-by-step instructions on how to add new cushions to resin chairs.
Step 1: Measure the Chair
Before purchasing cushions, you will need to measure the chair to ensure that the cushions you buy will fit properly. Measure the length, width, and depth of the seat and back of the chair.
Step 2: Choose the Cushions
Once you have the measurements, you can begin shopping for cushions. Choose cushions that are made from a durable, weather-resistant material, such as outdoor fabric or vinyl. Make sure the cushions are the right size for your chairs.
Step 3: Attach the Cushions
Once you have the cushions, you can attach them to the chairs. If the cushions have ties, use them to secure the cushions to the chair. If the cushions do not have ties, you can use Velcro or other adhesive strips to attach them.
Step 4: Enjoy Your New Cushions
Once the cushions are attached, you can enjoy your new, comfortable seating area. Make sure to check the cushions periodically to ensure that they are still securely attached.
By following these steps, you can easily add new cushions to your resin chairs and enjoy a more comfortable seating area.
How to Add New Hardware to Resin Chairs for a Modern Look
Adding new hardware to resin chairs is an easy and cost-effective way to give them a modern look. With a few simple steps, you can transform your outdoor seating area into a stylish and contemporary space.
First, choose the hardware you want to use. There are a variety of options available, including metal, plastic, and wood. Consider the overall look you want to achieve and select hardware that will complement the existing design of your chairs.
Next, measure the size of the hardware you have chosen. Make sure it is the correct size for the holes in your chairs. If the hardware is too large, you may need to drill new holes.
Once you have the correct size hardware, you can begin to attach it to the chairs. Start by placing the hardware in the holes and securing it with screws. Make sure the screws are tight and secure.
Finally, you can add a modern touch to your chairs by painting them. Choose a color that will complement the hardware and the existing design of the chairs. Once the paint is dry, you can enjoy your new modern look.
By following these steps, you can easily add new hardware to your resin chairs and give them a modern look. With a few simple changes, you can transform your outdoor seating area into a stylish and contemporary space.
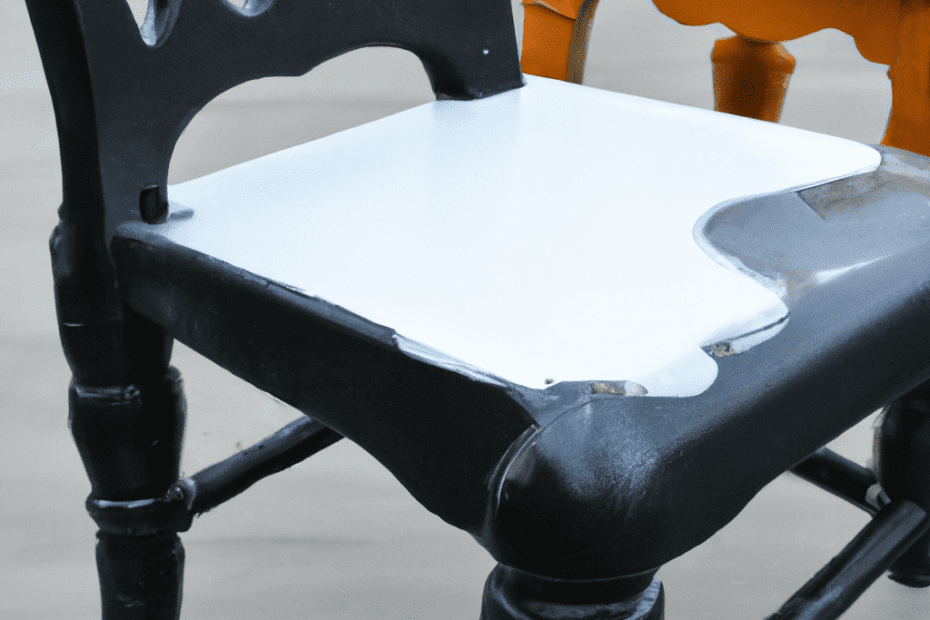
How to Refinish Resin Chairs for a Professional Finish
Refinishing resin chairs can be a great way to give them a professional finish and make them look like new. With the right tools and materials, you can easily refinish your resin chairs and make them look like they just came out of the store. Here is a step-by-step guide to help you get started.
Step 1: Prepare the Chairs
Before you begin the refinishing process, you need to prepare the chairs. Start by cleaning the chairs with a mild detergent and warm water. Use a soft cloth to wipe away any dirt or debris. Once the chairs are clean, use a sandpaper to lightly sand the surface of the chairs. This will help to remove any imperfections and create a smooth surface for the new finish.
Step 2: Apply Primer
Once the chairs are clean and sanded, you can apply a primer. Primer helps to create a base for the new finish and will help the paint adhere better. Use a brush or roller to apply the primer in even strokes. Allow the primer to dry completely before moving on to the next step.
Step 3: Paint the Chairs
Once the primer is dry, you can begin painting the chairs. Use a brush or roller to apply the paint in even strokes. Make sure to cover the entire surface of the chairs. Allow the paint to dry completely before moving on to the next step.
Step 4: Apply a Clear Coat
Once the paint is dry, you can apply a clear coat. This will help to protect the paint and give the chairs a professional finish. Use a brush or roller to apply the clear coat in even strokes. Allow the clear coat to dry completely before using the chairs.
By following these steps, you can easily refinish your resin chairs and give them a professional finish. With the right tools and materials, you can make your chairs look like new in no time.
How to Repair Cracks and Chips in Resin Chairs
Repairing cracks and chips in resin chairs is a relatively simple process that can be done with a few basic tools.
First, you will need to clean the area around the crack or chip with a damp cloth. This will help to remove any dirt or debris that may be present.
Next, you will need to fill the crack or chip with a resin filler. This can be purchased at most hardware stores. Make sure to read the instructions on the package carefully before using the product.
Once the resin filler has been applied, you will need to use a putty knife to spread it evenly over the crack or chip. Allow the filler to dry completely before proceeding.
Once the resin filler has dried, you will need to sand the area with a fine-grit sandpaper. This will help to smooth out any rough edges and ensure that the repair is even.
Finally, you will need to apply a coat of paint to the area. This will help to protect the repair and make it look more aesthetically pleasing.
By following these steps, you can easily repair cracks and chips in resin chairs. With a little bit of patience and the right tools, you can make your chairs look as good as new.
How to Add Decorative Accents to Resin Chairs
Adding decorative accents to resin chairs can be a great way to spruce up a room and give it a unique look. Resin chairs are a popular choice for outdoor furniture due to their durability and low maintenance. With a few simple steps, you can easily add decorative accents to your resin chairs to give them a more personalized touch.
First, decide what type of decorative accents you would like to add to your chairs. Consider the overall look and feel of the room and choose accents that will complement the existing decor. Popular options include colorful cushions, throw pillows, and decorative throws.
Next, measure the chairs to determine the size of the accents you will need. This will help you choose the right size cushions, pillows, and throws for your chairs.
Once you have the necessary measurements, you can begin shopping for the decorative accents. Look for items that are made from durable materials that can withstand the elements. Consider the colors and patterns of the accents to ensure they will match the existing decor.
When you have chosen the decorative accents, it is time to attach them to the chairs. If you are using cushions, you can use ties or Velcro to secure them to the chairs. For throw pillows and throws, you can use a staple gun or upholstery tacks to attach them.
Finally, enjoy your newly decorated chairs! With a few simple steps, you can easily add decorative accents to your resin chairs to give them a more personalized touch.
How to Create a Custom Design on Resin Chairs
Creating a custom design on a resin chair can be a fun and creative way to add a unique touch to your outdoor furniture. With a few simple steps, you can create a one-of-a-kind piece that will be the envy of your neighbors.
Before you begin, make sure you have all the necessary supplies. You will need a resin chair, a paintbrush, a paint roller, a paint tray, a drop cloth, and a variety of paints. Choose colors that will complement your outdoor space and create a design that reflects your personal style.
Once you have all the supplies, begin by laying the drop cloth on the ground and placing the chair on top. This will protect the ground from any paint spills. Next, use the paintbrush to apply a base coat of paint to the chair. Allow the paint to dry completely before continuing.
Once the base coat is dry, use the paint roller to apply a second coat of paint. This will help to ensure that the design is even and consistent. Once the second coat is dry, use the paintbrush to create the design of your choice. You can use stencils or freehand the design.
Once the design is complete, allow the paint to dry completely before using the chair. To ensure that the design lasts, apply a clear coat of sealant to the chair. This will help to protect the paint from fading or chipping.
With these simple steps, you can create a custom design on a resin chair that will be the envy of your neighbors. Enjoy your new outdoor furniture and the compliments that come with it!
How to Seal and Protect Resin Chairs for Long-Lasting Durability
For those looking to protect and seal their resin chairs for long-lasting durability, there are a few steps that should be taken. Resin chairs are a popular choice for outdoor furniture due to their lightweight and weather-resistant properties. However, without proper care and maintenance, they can become damaged and discolored over time. To ensure your resin chairs remain in good condition for years to come, follow these steps:
1. Clean the chairs thoroughly. Before applying any sealant, it is important to clean the chairs to remove any dirt, dust, or debris. Use a mild detergent and warm water to scrub the chairs, then rinse them off with a garden hose. Allow the chairs to dry completely before proceeding.
2. Apply a sealant. Once the chairs are dry, it is time to apply a sealant. There are a variety of sealants available, so choose one that is specifically designed for resin furniture. Apply the sealant according to the manufacturer’s instructions, making sure to cover the entire surface of the chairs. Allow the sealant to dry completely before using the chairs.
3. Protect the chairs from the elements. To ensure your resin chairs remain in good condition, it is important to protect them from the elements. If the chairs are exposed to direct sunlight, cover them with a tarp or other protective covering. Additionally, if the chairs are exposed to rain or snow, make sure to wipe them down with a damp cloth after each storm.
By following these steps, you can ensure your resin chairs remain in good condition for years to come. With proper care and maintenance, your chairs will remain durable and attractive for many years.
Q&A
1. What materials do I need to refurbish a resin chair?
You will need a mild detergent, a soft cloth, a scrub brush, a bucket, a sponge, a paintbrush, a paint roller, sandpaper, primer, and paint.
2. How do I prepare the chair for painting?
First, use a mild detergent and a soft cloth to clean the chair. Then, use a scrub brush to remove any dirt or debris. Next, use a bucket of warm water and a sponge to rinse the chair. Finally, use sandpaper to lightly sand the chair to create a smooth surface for painting.
3. What type of primer should I use?
You should use a primer that is specifically designed for use on plastic or resin surfaces.
4. How many coats of paint should I apply?
It is recommended to apply two coats of paint for the best results.
5. How long should I wait between coats of paint?
You should wait at least 24 hours between coats of paint to allow the primer and paint to dry completely.
6. What type of paint should I use?
You should use a paint that is specifically designed for use on plastic or resin surfaces.
7. How do I apply the paint?
You can use a paintbrush or a paint roller to apply the paint.
8. How long should I wait before using the chair?
You should wait at least 48 hours before using the chair to allow the paint to dry completely.
9. How do I maintain the chair?
You should clean the chair regularly with a mild detergent and a soft cloth.
10. Can I use the chair outdoors?
Yes, you can use the chair outdoors as long as it is properly sealed and maintained.
Conclusion
Refurbishing resin chairs is a great way to give them a new look and make them look like new. It is important to use the right materials and techniques to ensure that the chairs are properly refurbished and that the end result is a beautiful and durable piece of furniture. With a little bit of effort and the right supplies, you can easily refurbish your resin chairs and give them a new lease on life.
- how to fix resin chairs - April 20, 2024
- how to refurbish resin chairs - April 20, 2024
- how to restore resin chairs - April 20, 2024